This guide will walk you through the end to end process of how to retrain and compile YoloV11 from a PyTorch file into a HEF file executable by the Hailo accelerators using Google Colab. I decided to use colab as it’s a managed environment and should be accesible to everyone, although this does introduce some complexities. This also works for other Yolo versions, keep in mind that YoloV8 through YoloV11 use “equivalent architectures” at least in the eyes of the DFC.
Preparing our dataset: Yolo expects custom datasets to be formatted as such, so make sure you have a dataset that follows these criteria, I wrote my own python script to parse the dataset into the file structure indicated below:
- dataset
- train
- images
- labels
- val
- images
- labels
- test
- images
- labels
- train
Additionally, you may have to make a data.yaml file that points to your data
data_yaml_content = """
train: /path/to/dataset/train/
val: train: /path/to/dataset/val/

nc: 1 # number of classes
names: ['eartag'] #name of the class
"""
Generating a Custom YAML file
Since I’m simplifying the YoloV11 architecture, I made a custom YAML file, you can find the YAML files here. You can skip this section if you plan to use the default version of YoloV11.
I navigated to “11”, and copied yolo11.yaml locally, then make my modifications to the architecture there. Ensure that all the layer numbers match up, or else you will get a magnitude of errors when trying to retrain.
You can find more information here: Ultralytics
Installing YoloV11
Run these commands to install YoloV11:
#Installing the python package
!pip install ultralytics

#Verifying the installation
!pip show ultralytics
import ultralytics
ultralytics.checks()
from ultralytics import YOLO
from IPython.display import Image
Now to retrain:
from ultralytics import YOLO
detection_dataset = /path/to/dataset
"""
Note the model size (n,s,m,l,x) is automatically parsed
by Ultralytics. If you save your file as yolo11n.yaml, it will
retrain the n version of YoloV11, same goes for yolo11s.yaml
which I will be using.
"""

model = YOLO('/path/to/yolo11s.yaml')
model.train(data=f"{detection_dataset}/data.yaml", epochs=100, imgsz=640)
Can also run validation on your model here:
!yolo task=detect mode=val \
model="/path/to/YoloRetrained/weights/best.pt" \
    data="/path/to/dataset.yaml"
Converting our .PT file into ONNX
Now that you have your model, lets export it to ONNX first, which is a format Hailo can compile.
!yolo export model=path/to/best.pt format=onnx # export custom trained model
You can also do this by using:
import torch

# Load our model into our environment
checkpoint = torch.load('/path/to/best.pt')
model = checkpoint['model']

model = model.float()
model.eval()

# Dummy input in FP32
dummy_input = torch.randn(16, 3, 640, 640, dtype=torch.float)

# Export to ONNX
torch.onnx.export(
    model,
    dummy_input,
    "modified_run_3.onnx",
    export_params=True,
    opset_version=11,  # Adjust opset version if needed
    do_constant_folding=True,
    input_names=['input'],
    output_names=['output']
)
print("ONNX model exported successfully!")
Now, to verify that it’s a valid model:
import onnx
import onnxruntime as ort
import torch
# Load the ONNX model
onnx_model = onnx.load("modified_run_3.onnx")
onnx.checker.check_model(onnx_model)
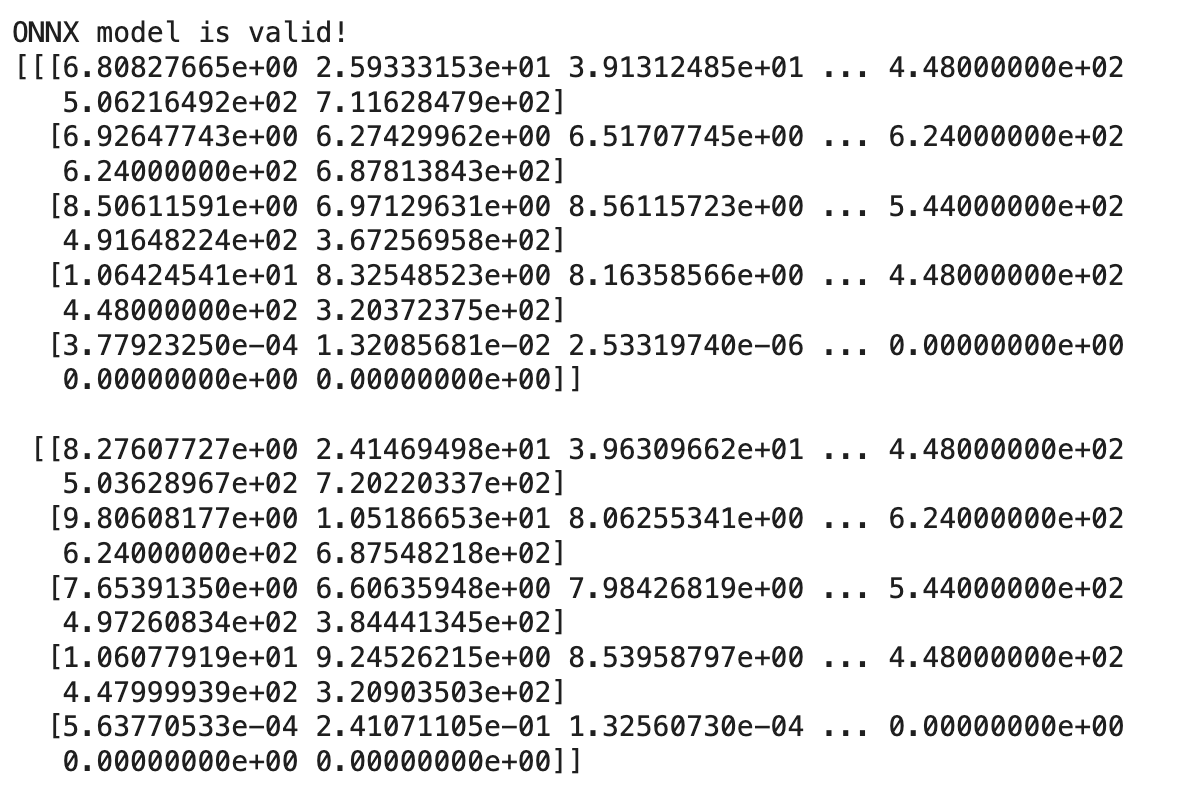
print("ONNX model is valid!")
# Test the ONNX model with ONNX Runtime
dummy_input = torch.randn(16, 3, 640, 640).numpy()
ort_session = ort.InferenceSession("modified_run_3.onnx")
outputs = ort_session.run(None, {"input": dummy_input})
print(outputs[0])
You should get something like this:
Installing the DFC
Installing all necessary site packages
!sudo apt-get update
!sudo apt-get install -y python3-dev python3-distutils python3-tk libfuse2 graphviz libgraphviz-dev

# Will need a venv to install the DFC in
!pip install --upgrade pip virtualenv
!virtualenv my_env
Note: You will run into errors if you don’t use the venv, I was getting the error below further into the compilation process due to not being in a venv:
TypeError: expected str, bytes or os.PathLike object, not NoneType
Install the DFC file, I’m using the newest version:
#Installing the WHL file for Hailo DFC
!my_env/bin/pip install /content/hailo_dataflow_compiler-3.29.0-py3-none-linux_x86_64.whl
# Making sure it's installed properly
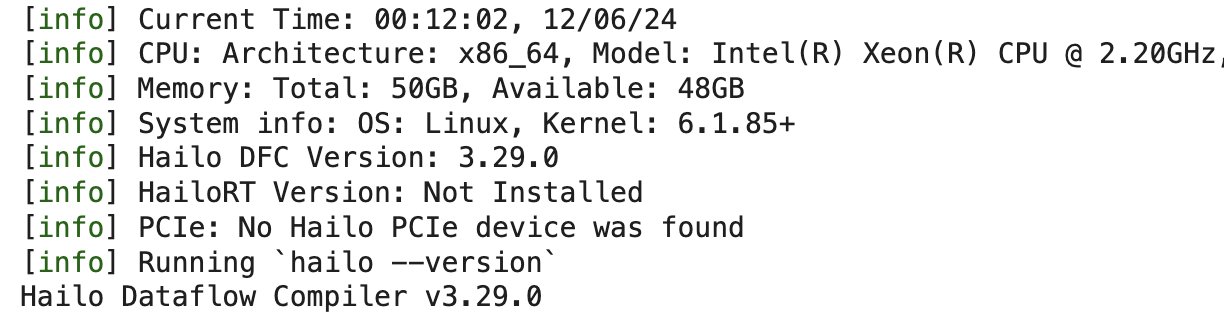
!my_env/bin/hailo --version
Should get something like this:
Identifying appropriate end node names
This step is extremely important, as it can be pretty frustrating to debug later on, so make sure you have the right end node names when parsing.
The first step the parsing process is to tell the tool which layers/nodes to expect the output from, aka (end nodes). Once we identify which end nodes are the correct ones by uploading our onnx file to Netron, we can continue with the first step of our compilation, parsing.
In our case, from YoloV8 to YoloV11 all use the “same architecture” in the eyes of the compiling tool, where for each feature map output, there are two end nodes per map. In our modified version of Yolo, we removed one of the feature maps, so now we have two remaining ones, meaning we have four total end nodes, instead of six.
To identify the Yolo’s end nodes, they are the nodes right before the post-processing operations at the very bottom of the model, shown below:
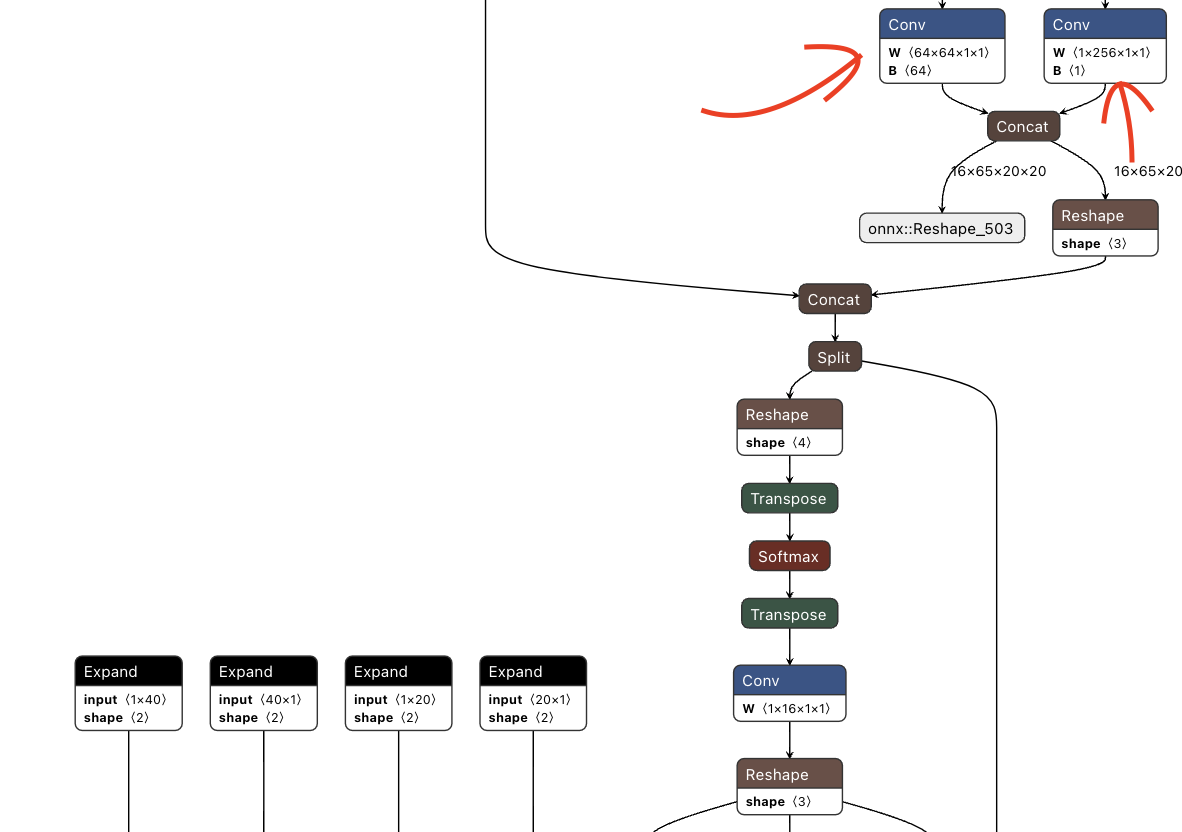
And here is the other branch leading to the concat operation at the end in the image above.
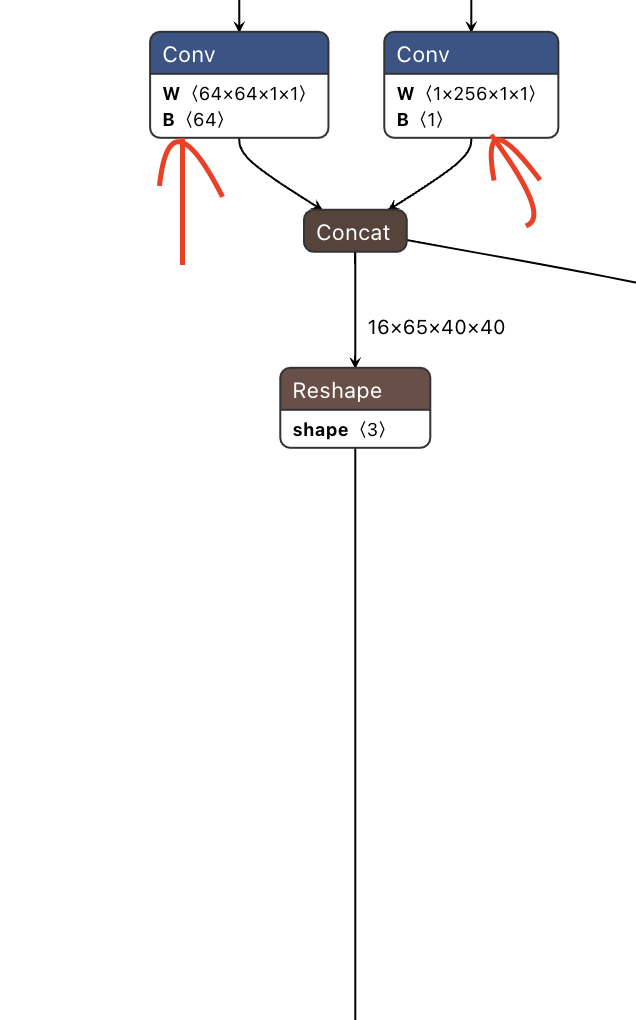
If you have any trouble with identifying them, the parsing tool should recommend end nodes to choose if you specify “output” as the end node, however, verify them with this process above, there are also several other articles on the Hailo forum denoting how to find the proper end nodes.
Step 1. Parsing our ONNX file
This is the script I used to parse my model, I saved this script locally:
from hailo_sdk_client import ClientRunner

# Define the ONNX model path and configuration
onnx_path = "/content/modified_run_3.onnx"
onnx_model_name = "modified_run_3_renamed"
chosen_hw_arch = "hailo8"  # Specify the target hardware architecture

# Initialize the ClientRunner
runner = ClientRunner(hw_arch=chosen_hw_arch)

# Use the recommended end node names for translation
end_node_names = [
    "/model.14/cv2.0/cv2.0.2/Conv",  # P4 regression_layer
    "/model.14/cv3.0/cv3.0.2/Conv",  # P4 cls_layer
    "/model.14/cv2.1/cv2.1.2/Conv",  # P5 regression_layer
    "/model.14/cv3.1/cv3.1.2/Conv",  # P5 cls_layer,
]

try:
    # Translate the ONNX model to Hailo's format
    hn, npz = runner.translate_onnx_model(
        onnx_path,
        onnx_model_name,
        end_node_names=end_node_names,
        net_input_shapes={"input": [16, 3, 640, 640]},  # Adjust input shapes if needed
    )
    print("Model translation successful.")
except Exception as e:
    print(f"Error during model translation: {e}")
    raise

# Save the Hailo model HAR file
hailo_model_har_name = f"{onnx_model_name}_hailo_model.har"
try:
    runner.save_har(hailo_model_har_name)
    print(f"HAR file saved as: {hailo_model_har_name}")
except Exception as e:
    print(f"Error saving HAR file: {e}")
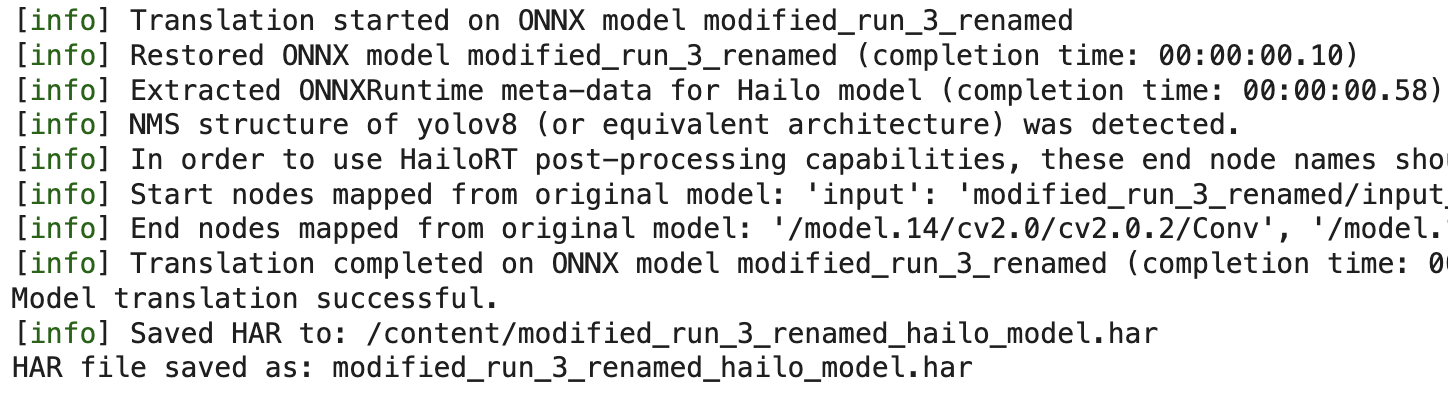
Then I ran this with:
!my_env/bin/python translate_model.py
You should get something like this
Step 2: Optimizing our model
For this step, we will have to make a custom .alls file (model script), a NMS config, and calibrated data.
First, since Hailo has their own renaming process, we have to find the new names of our end nodes. Below is code to print out the dictionary of layers and operations stored by the .har file, find the end node names identified by output_layers_order.
from hailo_sdk_client import ClientRunner

# Load the HAR file
har_path = "modified_run_3_renamed_hailo_model.har"

runner = ClientRunner(har=har_path)

from pprint import pprint

try:
    # Access the HailoNet as an OrderedDict
    hn_dict = runner.get_hn()  # Or use runner._hn if get_hn() is unavailable
    print("Inspecting layers from HailoNet (OrderedDict):")

    # Pretty-print each layer
    for key, value in hn_dict.items():
        print(f"Key: {key}")
        pprint(value)
        print("\n" + "="*80 + "\n")  # Add a separator between layers for clarity

except Exception as e:
    print(f"Error while inspecting hn_dict: {e}")
Expected output:
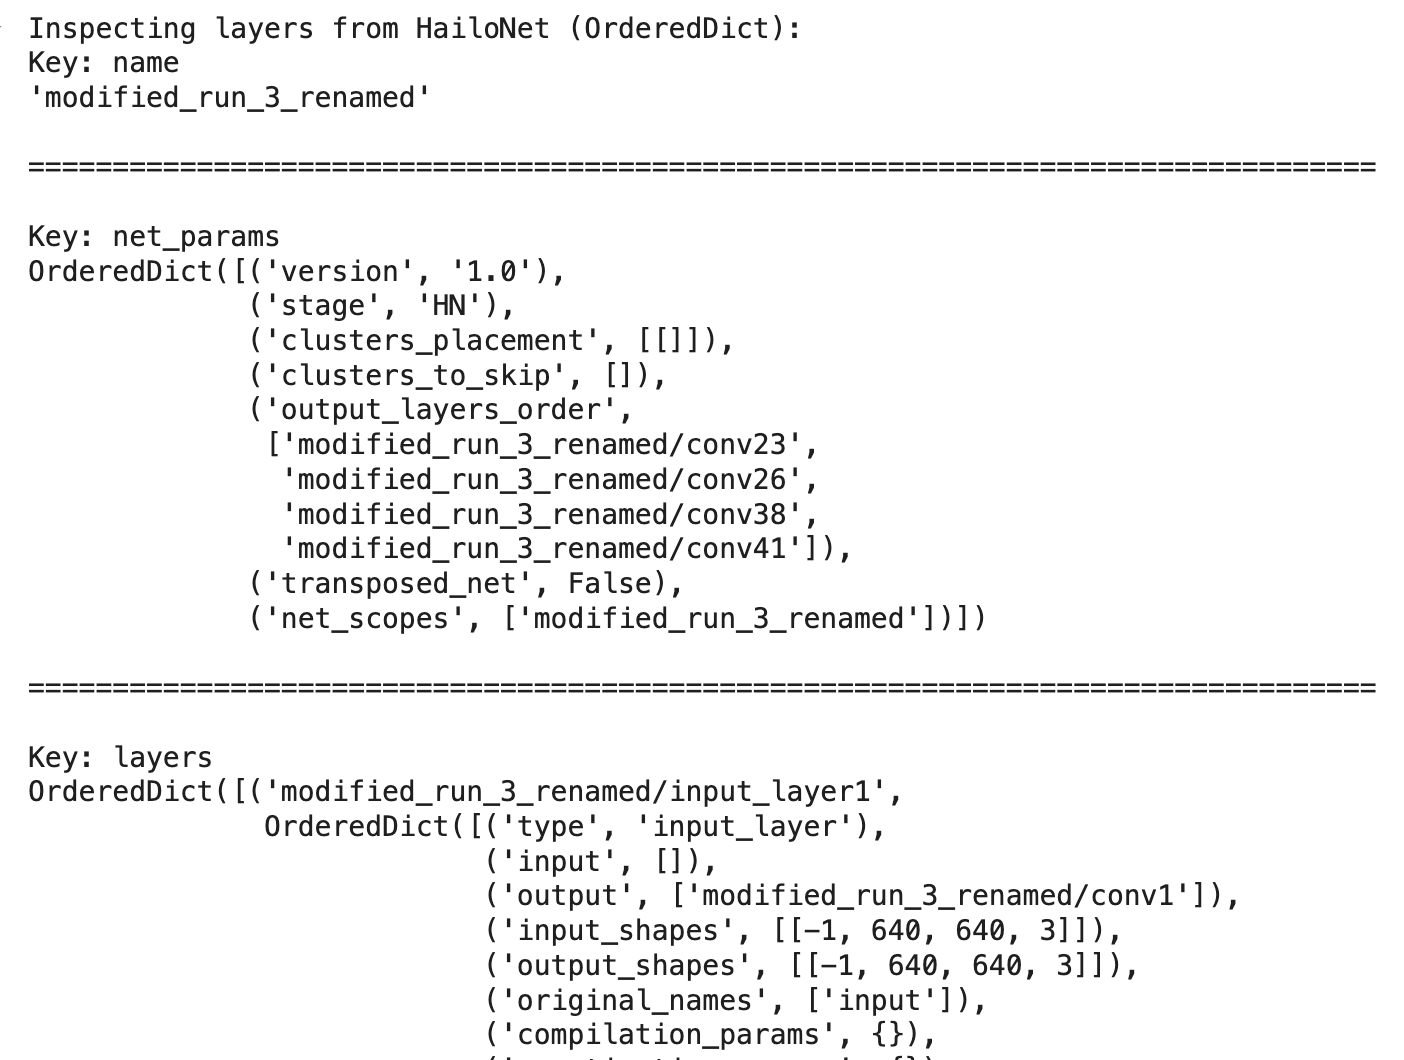
Now, you can scroll through the output to verify which layers correspond to which end node in your ONNX model. In this dict, each layer is stored under a new name, and it’s original name is a key within the layer under ‘original_names’. You will need this when generating a NMS file for your model, you can find examples NMS configs here.
Here is how I did it:
import json
import os
from google.colab import drive

# Mount Google Drive
drive.mount('/content/drive/', force_remount=True)

# Updated NMS layer configuration dictionary
nms_layer_config = {
    "nms_scores_th": 0.3,
    "nms_iou_th": 0.7,
    "image_dims": [640, 640],
    "max_proposals_per_class": 25,
    "classes": 1,
    "regression_length": 16,
    "background_removal": False,
    "background_removal_index": 0,
    "bbox_decoders": [
        {
            "name": "bbox_decoder23",
            "stride": 16,
            "reg_layer": "conv23",
            "cls_layer": "conv26"
        },
        {
            "name": "bbox_decoder38",
            "stride": 32,
            "reg_layer": "conv38",
            "cls_layer": "conv41"
        }
    ]
}

# Path to save the updated JSON configuration
output_dir = "/save/path/"
os.makedirs(output_dir, exist_ok=True)  # Create the directory if it doesn't exist
output_path = os.path.join(output_dir, "nms_layer_config.json")

# Save the updated configuration as a JSON file
with open(output_path, "w") as json_file:
    json.dump(nms_layer_config, json_file, indent=4)

print(f"NMS layer configuration saved to {output_path}")
After this, I made calibration data for the optimization step.
import numpy as np
from PIL import Image
import os
from google.colab import drive

# Mounting Google Drive
drive.mount('/content/drive/', force_remount=True)

# Paths to directories and files
image_dir = '/input/path'
output_dir = '/path/to/output_dir'
os.makedirs(output_dir, exist_ok=True)  # Create the directory if it doesn't exist

# File paths for saving calibration data
calibration_data_path = os.path.join(output_dir, "calibration_data.npy")
processed_data_path = os.path.join(output_dir, "processed_calibration_data.npy")

# Initialize an empty list for calibration data
calib_data = []

# Process all image files in the directory
for img_name in os.listdir(image_dir):
    img_path = os.path.join(image_dir, img_name)
    if img_name.lower().endswith(('.jpg', '.jpeg', '.png')):
        img = Image.open(img_path).resize((640, 640))  # Resize to desired dimensions
        img_array = np.array(img) / 255.0  # Normalize to [0, 1]
        calib_data.append(img_array)

# Convert the calibration data to a NumPy array
calib_data = np.array(calib_data)

# Save the normalized calibration data
np.save(calibration_data_path, calib_data)
print(f"Normalized calibration dataset saved with shape: {calib_data.shape} to {calibration_data_path}")

# Scale the normalized data back to [0, 255]
processed_calibration_data = calib_data * 255.0

# Save the processed calibration data
np.save(processed_data_path, processed_calibration_data)
print(f"Processed calibration dataset saved with shape: {processed_calibration_data.shape} to {processed_data_path}")
Now, we’re finally ready to optimize it with this script, you can find sample .alls files here, I referenced yolo10nms.json as a base to create my alls file.
Note that the change_output_activation applied to my CLS_layer, you can go back and verify this with Netron like specified above.
import os
from hailo_sdk_client import ClientRunner

# Define your model's HAR file name
model_name = "modified_run_3_renamed"
hailo_model_har_name = f"{model_name}_hailo_model.har"
hailo_model_har_name = "modified_run_3_renamed_hailo_model.har"

# Ensure the HAR file exists
assert os.path.isfile(hailo_model_har_name), "Please provide a valid path for the HAR file"

# Initialize the ClientRunner with the HAR file
runner = ClientRunner(har=hailo_model_har_name)

# Define the model script to add a normalization layer
# Normalization for [0, 1] range
alls = \"\"\"
normalization1 = normalization([0.0, 0.0, 0.0], [255.0, 255.0, 255.0])
change_output_activation(conv26, sigmoid)
change_output_activation(conv41, sigmoid)
nms_postprocess("/content/nms_layer_config.json", meta_arch=yolov8, engine=cpu)
performance_param(compiler_optimization_level=max)
\"\"\"

# Load the model script into the ClientRunner
runner.load_model_script(alls)

# Define a calibration dataset
# Replace 'calib_dataset' with the actual dataset you're using for calibration
# For example, if it's a directory of images, prepare the dataset accordingly
calib_dataset = "/content/processed_calibration_data.npy"

# Perform optimization with the calibration dataset
runner.optimize(calib_dataset)

# Save the optimized model to a new Quantized HAR file
quantized_model_har_path = f"{model_name}_quantized_model.har"
runner.save_har(quantized_model_har_path)

print(f"Quantized HAR file saved to: {quantized_model_har_path}")
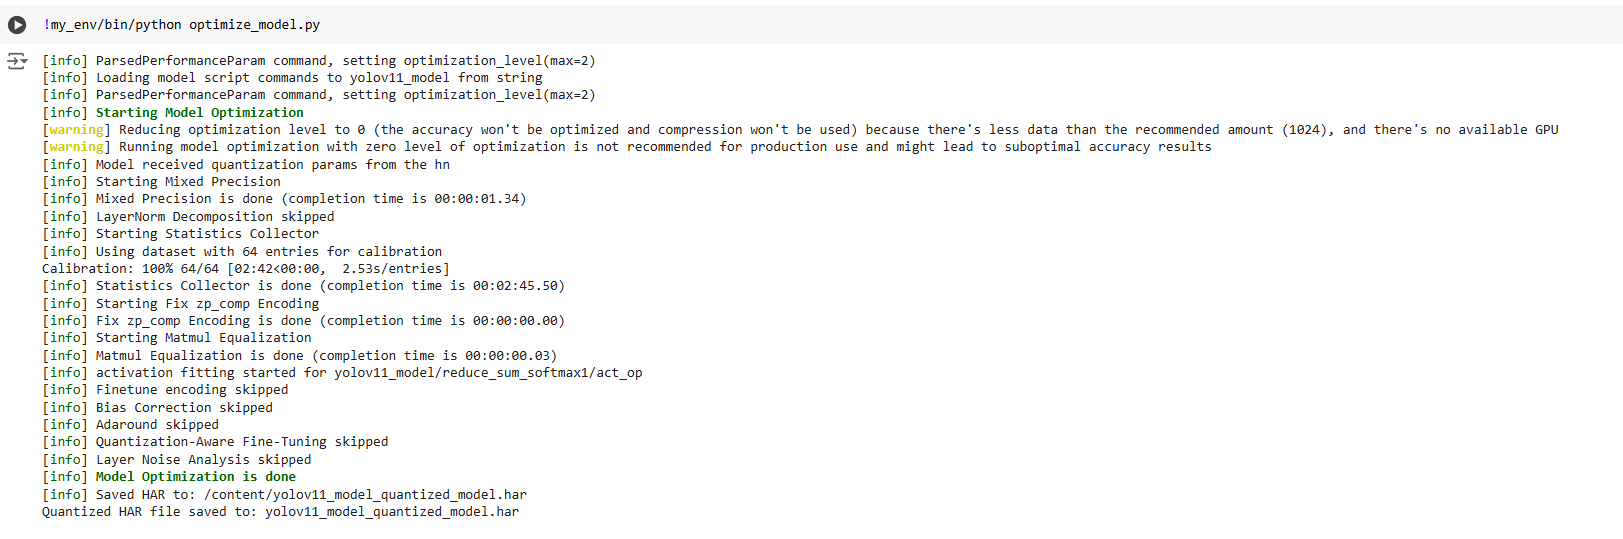
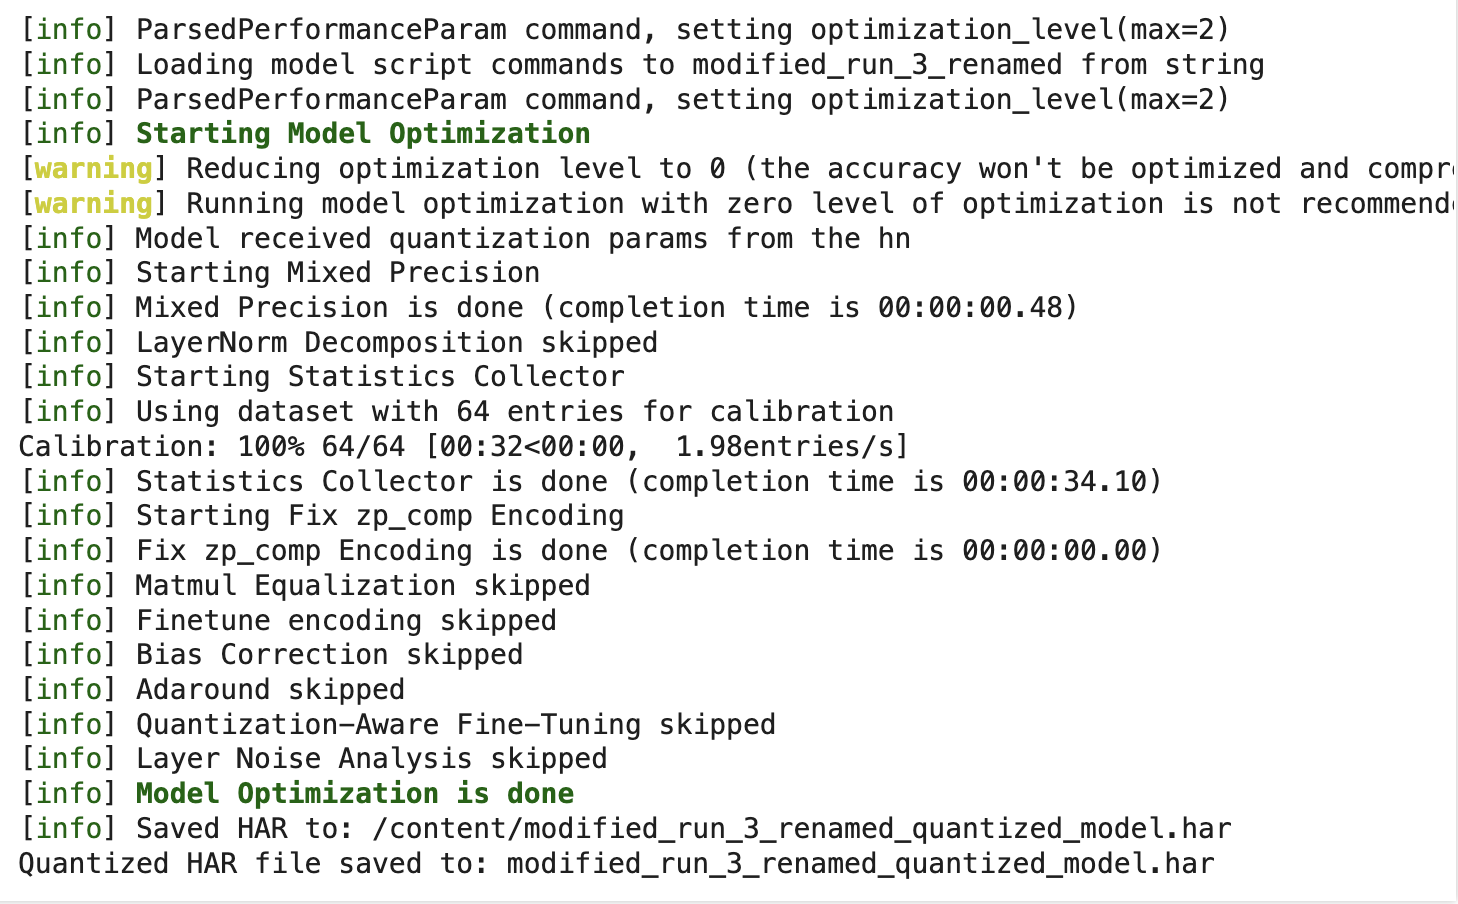
Now running it:
!my_env/bin/python optimize_model.py
Expected output:
Compiling our model
Now for the final step, compilation, this is a local script I made.
from hailo_sdk_client import ClientRunner

# Define the quantized model HAR file
model_name = "modified_run_3_renamed"
quantized_model_har_path = f"{model_name}_quantized_model.har"

# Initialize the ClientRunner with the HAR file
runner = ClientRunner(har=quantized_model_har_path)
print("[info] ClientRunner initialized successfully.")

# Compile the model
try:
    hef = runner.compile()
    print("[info] Compilation completed successfully.")
except Exception as e:
    print(f"[error] Failed to compile the model: {e}")
    raise
file_name = f"{model_name}.hef"
with open(file_name, "wb") as f:
    f.write(hef)
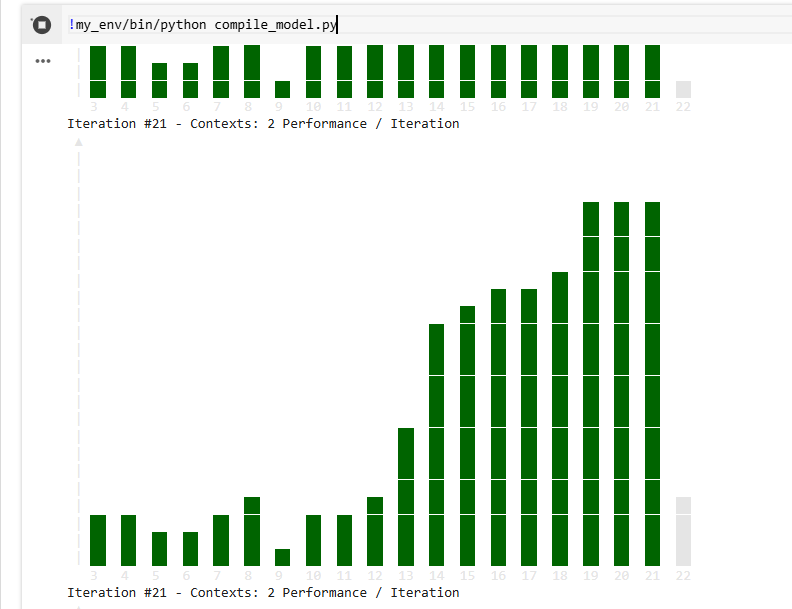
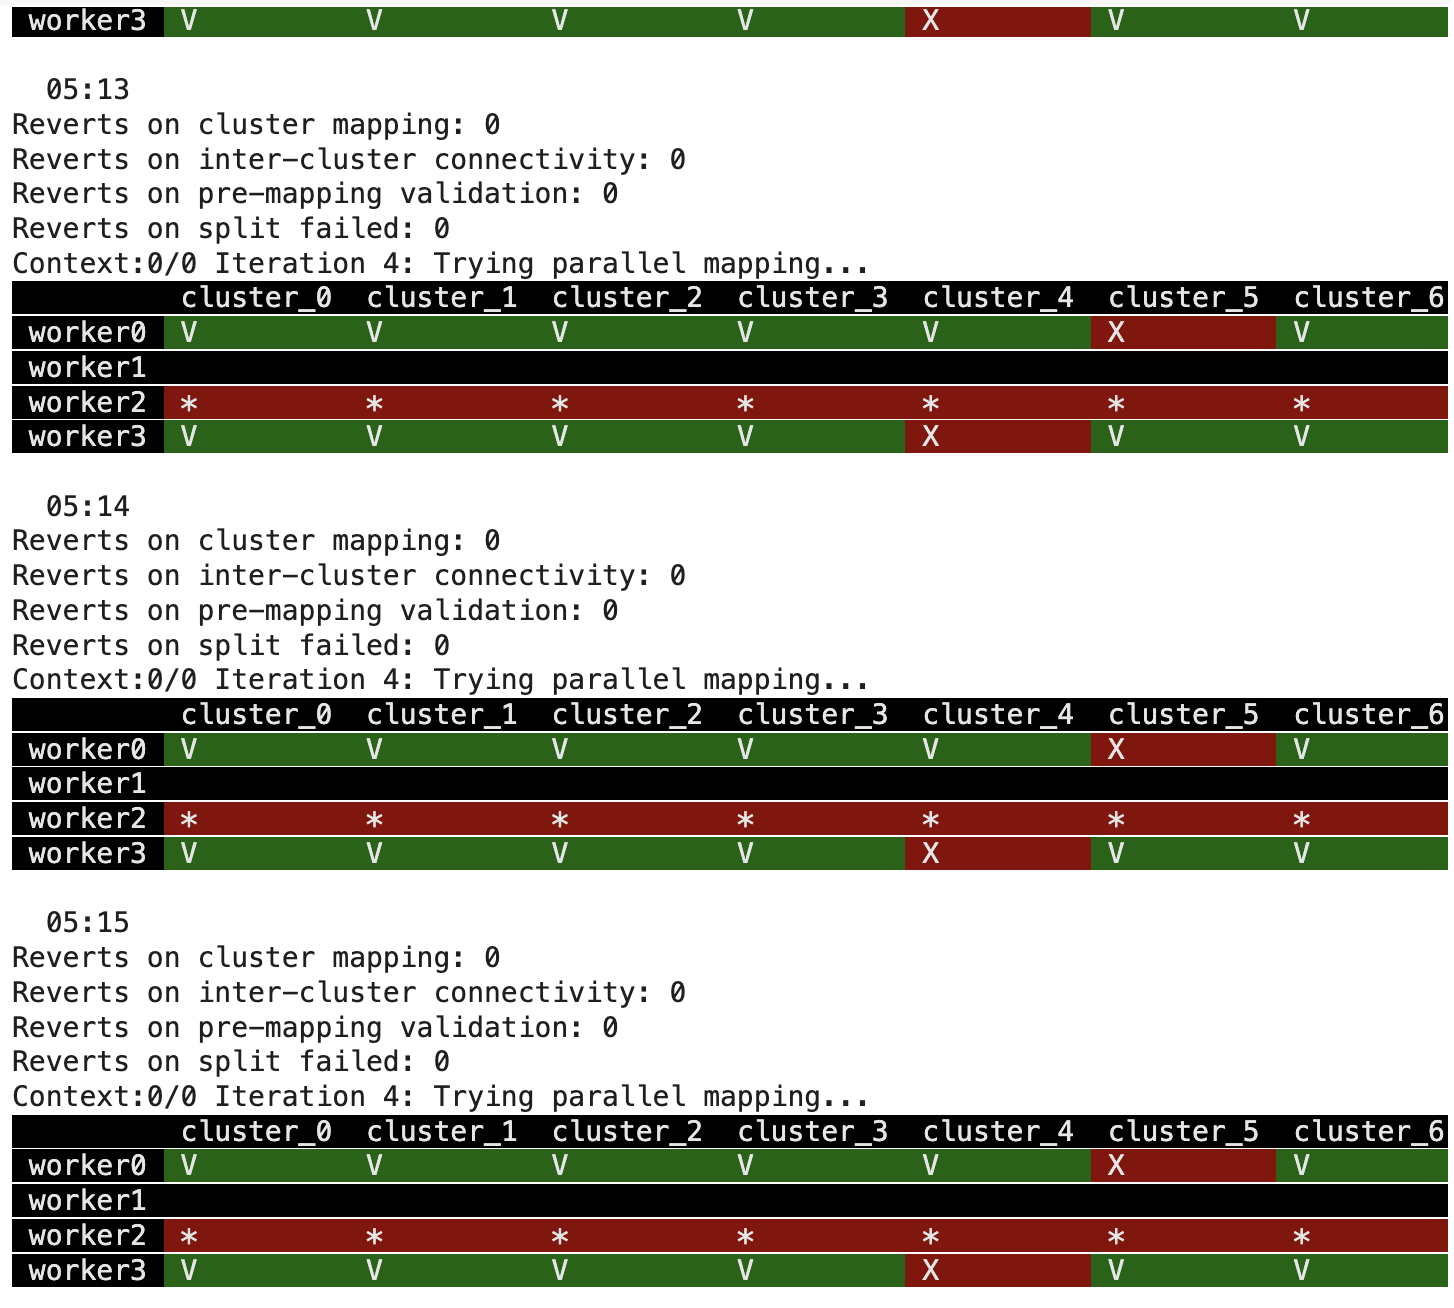
Now run:
!my_env/bin/python compile_model.py
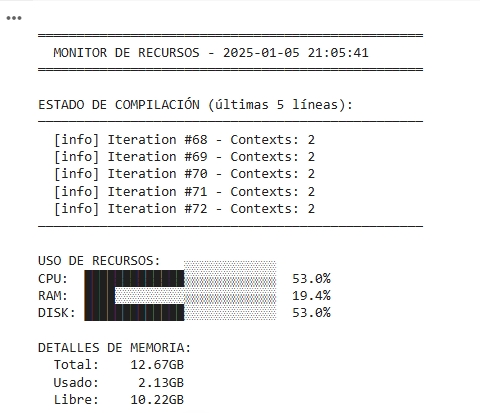
Expected output, something like this:
And there you go! That should be the entire compilation process with colab! For actual inference steps, I’m doing object detection with a Raspberry Pi camera, and picamera2 just released new examples with the Hailo accelerators that you can just run on startup. You can find them here.