Simplifying Object Detection on a Hailo Device Using DeGirum PySDK
In this guide, we illustrate how to leverage the built-in features of PySDK to simplify running object detection models on Hailo devices with just a few lines of code. We recommend reviewing User Guide 2 before proceeding. By the end of this guide, you’ll understand how to integrate any precompiled object detection model (with Hailo NMS postprocessing) with DeGirum PySDK and adapt the process to your needs.
Overview of the Inference Pipeline
The overall inference pipeline in PySDK can be summarized as follows:
- Pre-Processing: Prepare the input image by resizing and formatting it (e.g., applying letterboxing) to meet model requirements before inference.
- Inference: Run the precompiled model (e.g.,
.heffile) on the Hailo device. - Post-Processing: Convert raw model outputs into human-readable detections (bounding boxes, labels, etc.) using a post-processor class.
- Visualization: Overlay the detection results onto the original image for easy inspection.
A diagram of this flow looks like:
Input Image
    │
    ▼
Pre-Processing (resize, quantize, etc.)
    │
    ▼
Model Inference (Hailo device using .hef file)
    │
    ▼
Post-Processing (custom Python class: PostProcessor)
    │
    ▼
Detection Results (bounding boxes, labels, confidence scores)
    │
    ▼
Visualization (image overlay using OpenCV)
What You’ll Need to Begin
To follow this guide, you’ll need a machine equipped with a Hailo AI accelerator (Hailo8 or Hailo8L). The host CPU can be an x86 system or an Arm-based system (e.g., Raspberry Pi). Ensure that all necessary drivers and software tools are correctly installed by following the Hailo + PySDK setup instructions.
Here’s what else you’ll need:
-
A Model File (
.hef):
For this guide, we use theyolov11ndetection model. The model is available for Hailo8 devices at Hailo8 Object Detection Models. -
An Input Image:
The image you want to process. For instance, you can download this Cat Image. -
A Labels File (
labels_coco.json):
This file maps class indices to human-readable labels for the 80 classes of the COCO dataset. You can download it from Hugging Face.
Download these assets and keep them handy, as you will use them throughout this guide.
Summary
In this guide, you will learn to:
- Configure the Model JSON File: Set up a JSON file that defines key configurations for pre-processing, model parameters, and post-processing.
- Define the Post-Processor Class: Develop a post-processor class (named
PostProcessoras required by PySDK) to process model outputs. - Prepare the Model Zoo: Organize model files (the
.jsonconfiguration,.heffile, Python post-processor file, and the labels file) for seamless integration with PySDK. - Run Inference: Write Python code to load the model, run inference, and print the detection results.
- Visualize the Output: Use the
image_overlaymethod to visualize the detection results.
Configuring the Model JSON File
Below is the JSON file that leverages PySDK’s built-in pre-processor and post-processor features.
Model JSON (yolov11n.json)
{
    "ConfigVersion": 10,
    "DEVICE": [
        {
            "DeviceType": "HAILO8",
            "RuntimeAgent": "HAILORT",
            "SupportedDeviceTypes": "HAILORT/HAILO8"
        }
    ],
    "PRE_PROCESS": [
        {
            "InputType": "Image",
            "InputN": 1,
            "InputH": 640,
            "InputW": 640,
            "InputC": 3,
            "InputPadMethod": "letterbox",
            "InputResizeMethod": "bilinear",
            "InputQuantEn": true
        }
    ],
    "MODEL_PARAMETERS": [
        {
            "ModelPath": "yolov11n.hef"
        }
    ],
    "POST_PROCESS": [
        {
            "OutputPostprocessType": "Detection",
            "PythonFile": "HailoDetectionYolo.py",
            "OutputNumClasses": 80,
            "LabelsPath": "labels_coco.json",
            "OutputConfThreshold": 0.3
        }
    ]
}
Key Entries
-
Pre-Processing Section:
Specifies that the input is an image that must be resized to 1 x 640 x 640 x 3 using letterboxing (to preserve aspect ratio) and that the model input is quantized to UINT8. -
Post-Processing Section:
Indicates that the model output will be post-processed using the Python code in HailoDetectionYolo.py. Additional parameters likeOutputNumClasses,OutputConfThreshold, andLabelsPathare provided to fine-tune the detection results.
Defining the Post-Processor Class
The PySDK requires a post-processor class to be named PostProcessor in the module for automatic detection. This class reads the JSON-based configuration, processes the raw outputs from the model, and formats the outputs into a list of detections (bounding boxes, labels, etc.).
Post-Processor Code (HailoDetectionYolo.py)
import numpy as np
import json

# Post-processor class. Note: It must be named 'PostProcessor' for PySDK to detect and invoke it.
class PostProcessor:
    def __init__(self, json_config):
        """
        Initialize the post-processor with configuration settings.

        Parameters:
            json_config (str): JSON string containing post-processing configuration.
        """
        # Parse the JSON configuration
        self._json_config = json.loads(json_config)

        # Extract configuration parameters
        self._num_classes = int(self._json_config["POST_PROCESS"][0]["OutputNumClasses"])
        self._label_json_path = self._json_config["POST_PROCESS"][0]["LabelsPath"]
        self._input_height = int(self._json_config["PRE_PROCESS"][0]["InputH"])
        self._input_width = int(self._json_config["PRE_PROCESS"][0]["InputW"])

        # Load label dictionary from JSON file
        with open(self._label_json_path, "r") as json_file:
            self._label_dictionary = json.load(json_file)

        # Extract confidence threshold; defaults to 0.0 if not specified
        self._output_conf_threshold = float(
            self._json_config["POST_PROCESS"][0].get("OutputConfThreshold", 0.0)
        )

    def forward(self, tensor_list, details_list):
        """
        Process the raw output tensor to produce formatted detection results.

        Parameters:
            tensor_list (list): List of output tensors from the model.
            details_list (list): Additional details (e.g., quantization info); not used in this example.

        Returns:
            list: A list of dictionaries, each representing a detection result.
        """
        # Initialize a list to store detection results
        new_inference_results = []

        # The first tensor is assumed to contain all detection data.
        # Reshape it to a 1D array for easier processing.
        output_array = tensor_list[0].reshape(-1)

        index = 0  # Track current position in output_array

        # Iterate over each class
        for class_id in range(self._num_classes):
            # Read the number of detections for the current class
            num_detections = int(output_array[index])
            index += 1

            if num_detections == 0:
                # No detections for this class; move to the next one.
                continue

            # Process each detection for the current class
            for _ in range(num_detections):
                # Ensure there are enough elements for a complete detection record (4 bbox coordinates + score)
                if index + 5 > len(output_array):
                    break

                # Extract bounding box coordinates and the confidence score.
                # The format is assumed to be: [y_min, x_min, y_max, x_max, score]
                y_min, x_min, y_max, x_max = map(float, output_array[index : index + 4])
                score = float(output_array[index + 4])
                index += 5

                # Apply confidence threshold; skip detection if below threshold
                if score < self._output_conf_threshold:
                    continue

                # Convert normalized coordinates to absolute pixel values based on input dimensions
                x_min_abs = x_min * self._input_width
                y_min_abs = y_min * self._input_height
                x_max_abs = x_max * self._input_width
                y_max_abs = y_max * self._input_height

                # Build the detection result dictionary
                result = {
                    "bbox": [x_min_abs, y_min_abs, x_max_abs, y_max_abs],
                    "score": score,
                    "category_id": class_id,
                    "label": self._label_dictionary.get(str(class_id), f"class_{class_id}"),
                }
                new_inference_results.append(result)

            # If the remainder of the output_array is nearly or fully consumed, exit early.
            if index >= len(output_array) or all(v == 0 for v in output_array[index:]):
                break

        # Return the list of formatted detection results.
        return new_inference_results
Explanation of Key Sections
-
Class Definition & Naming
- The class is named
PostProcessorbecause PySDK requires this exact name to automatically detect and invoke the post-processing logic.
- The class is named
-
Initialization (
__init__)- The JSON configuration string is parsed to extract model parameters such as the number of classes (
OutputNumClasses), the path to the labels file (LabelsPath), input dimensions (InputHandInputW), and the confidence threshold (OutputConfThreshold). - The labels file is loaded to map class IDs to human-readable labels.
- The JSON configuration string is parsed to extract model parameters such as the number of classes (
-
Forward Method (
forward)- This method processes the raw tensor output by iterating through each class and its corresponding detections.
- It applies the confidence threshold, converts normalized bounding box coordinates to absolute pixel values, and assembles each detection into a dictionary.
- Detailed inline comments explain the purpose of key code sections, aiding in future customization or debugging.
Preparing the Model Zoo
A model zoo is a structured repository of model assets (configuration JSON files, model files, post-processor code, and labels) that simplifies model management. To organize your assets:
- Save the above JSON configuration as
yolov11n.json. - Place the corresponding
yolov11n.heffile in the same directory. - Save the post-processor code in a file named
HailoDetectionYolo.py. - Save the labels file as
labels_coco.json.
Tip: For easier maintenance, you can organize models into separate subdirectories. PySDK will automatically search for model JSON files in all subdirectories inside the directory specified by the zoo_url.
Running Inference
The yolov11n model, configured by the above JSON file, takes an image as input and outputs a list of dictionaries, each containing a bounding box, confidence score, class ID, and label. The results are scaled to the original image size.
import degirum as dg
from pprint import pprint

# Load the model from the model zoo.
# Replace '<path_to_model_zoo>' with the directory containing your model assets.
model = dg.load_model(
    model_name='yolov11n',
    inference_host_address='@local',
    zoo_url='<path_to_model_zoo>'
)

# Run inference on the input image.
# Replace '<path_to_cat_image>' with the actual path to your cat image.
inference_result = model('<path_to_cat_image>')

# Pretty print the detection results.
pprint(inference_result.results)
Expected output (example):
[{'bbox': [254.35779146128206,
           94.76393992199104,
           899.6128147829603,
           707.9610544375571],
  'category_id': 15,
  'label': 'cat',
  'score': 0.8902369737625122}]
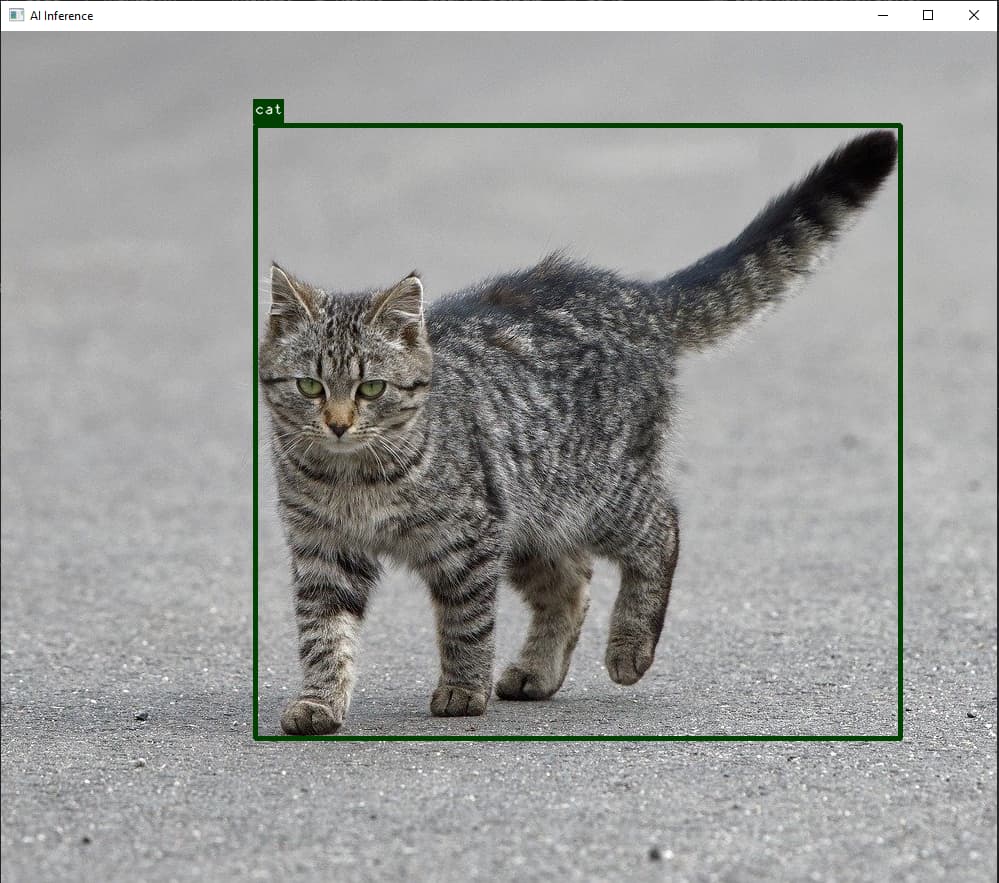
Visualizing the Output
PySDK supports automatic visualization of inference results. The returned inference_result object includes an image_overlay method that overlays bounding boxes and labels on the input image. The code below shows how to use OpenCV for visualization:
import cv2

# Display the image with overlayed detection results.
cv2.imshow("AI Inference", inference_result.image_overlay)

# Wait for the user to press 'x' or 'q' to exit.
while True:
    key = cv2.waitKey(0) & 0xFF  # Wait indefinitely until a key is pressed.
    if key == ord('x') or key == ord('q'):
        break
cv2.destroyAllWindows()  # Close all OpenCV windows.
Note: The cv2.waitKey(0) function waits indefinitely for a key press, which is useful for pausing the display until the user is ready to close it.
An example of the output is shown below:
Troubleshooting and Debug Tips
-
File Naming and Paths:
Ensure that file names (yolov11n.json,yolov11n.hef,HailoDetectionYolo.py, andlabels_coco.json) are consistent and that the paths specified in the JSON file are correct. -
Configuration Mismatches:
Verify that the input dimensions and quantization settings in the JSON file match your model’s requirements.
Conclusion
This guide demonstrated how PySDK simplifies running object detection models on Hailo devices by integrating built-in pre-processing, post-processing, and visualization features. Although we used the yolov11n model as an example, the outlined method applies to other object detection models that utilize built-in NMS post-processing on Hailo devices.
Below is a list of supported models for reference:
| nanodet_repvgg.hef | nanodet_repvgg_a12.hef | nanodet_repvgg_a1_640.hef |
| yolov10b.hef | yolov10n.hef | yolov10s.hef |
| yolov10x.hef | yolov11l.hef | yolov11m.hef |
| yolov11n.hef | yolov11s.hef | yolov11x.hef |
| yolov5m.hef | yolov5m_6.1.hef | yolov5m6_6.1.hef |
| yolov5m_wo_spp.hef | yolov5s.hef | yolov5s_c3tr.hef |
| yolov5s_wo_spp.hef | yolov5xs_wo_spp.hef | yolov5xs_wo_spp_nms_core.hef |
| yolov6n.hef | yolov6n_0.2.1_nms_core.hef | yolov7.hef |
| yolov7_tiny.hef | yolov7e6.hef | yolov8l.hef |
| yolov8m.hef | yolov8n.hef | yolov8s.hef |
| yolov8x.hef | yolov9c.hef | yolox_l_leaky.hef |
| yolox_s_leaky.hef | yolox_s_wide_leaky.hef | yolox_tiny.hef |
The same post-processor work for the 5 models below as well but the efficientdet models have 89 output classes and ssd_mobilenet models have 90 output classes. For these models, the appropriate labels file should be used. These models are listed below:
| model name | number of classes |
|---|---|
| efficientdet_lite0 | 89 |
| efficientdet_lite1 | 89 |
| efficientdet_lite2 | 89 |
| ssd_mobilenet_v1 | 90 |
| ssd_mobilenet_v2 | 90 |
The above lists together cover 41 of the 56 models available in the object detection model zoo. The remaining 15 models listed below require their own post-processors. We will cover them in later user guides.
| centernet_resnet_v1_18_postprocess | centernet_resnet_v1_50_postprocess | damoyolo_tinynasL20_T |
| damoyolo_tinynasL25_S | damoyolo_tinynasL35_M | detr_resnet_v1_18_bn |
| detr_resnet_v1_50 | tiny_yolov3 | tiny_yolov4 |
| yolov3 | yolov3_416 | yolov3_gluon |
| yolov3_gluon_416 | yolov4_leaky | yolov6n_0.2.1 |
Custom Models
The method described in this guide is not limited to precompiled models from the Hailo model zoo. It works equally well with custom models. If you plan to deploy your own object detection models, make sure to adjust the JSON configuration with the correct values. In particular, update the OutputNumClasses field to match the number of classes your model detects and provide an appropriate labels file in the LabelsPath field. This ensures that the post-processor correctly interprets the raw output and maps class indices to human-readable labels.