This guide will walk through how to retrain YOLOv5 on a custom dataset, in particular a subset of coco-2017 that contains only “person”, “car” and “bicycle” classes. For best practices with different datasets refer to:
Tips for Best Training Results
Downloading a subset of COCO 2017
Prerequisites:
- pycotools
pip install git+https://github.com/waleedka/cocoapi.git#egg=pycocotools&subdirectory=PythonAPI
- fiftyone
pip install fiftyone
Download the subset of COCO 2017 with “person”, “car” and “bicycle” classes
import fiftyone.zoo as foz
dataset = foz.load_zoo_dataset(
“coco-2017”,
splits=[“train”, “validation”, “test”],
label_type=“detections”,
classes=[“person”, “car”, “bicycle”],
)
Note that this will result in a dataset with annotations that contains at least one of the desired classes, but that may also have undesired ones. Therefore, extra processing of the dataset is required to get rid of these extra labels.
Preparing Dataset for YOLOv5
The dataset must be pre-processed to fit yolov5 requirements.
YOLOv5 dataset format
There should be two folders:
- Labels: one file named labels containing all categories and one .txt file per image containing one row per object. Each row must have the format:
label x_center y_center width - Images: all image files.
Formatting
The dataset can be formatted either automatically with Roboflow, or manually. I chose to do it manually because the dataset needed further cleaning of the annotations.
Roboflow
Follow steps from Train Custom Data
Manually
The coco 2017 dataset annotations contain the following format for the bounding box annotation: top left x position, top left y position, width, height
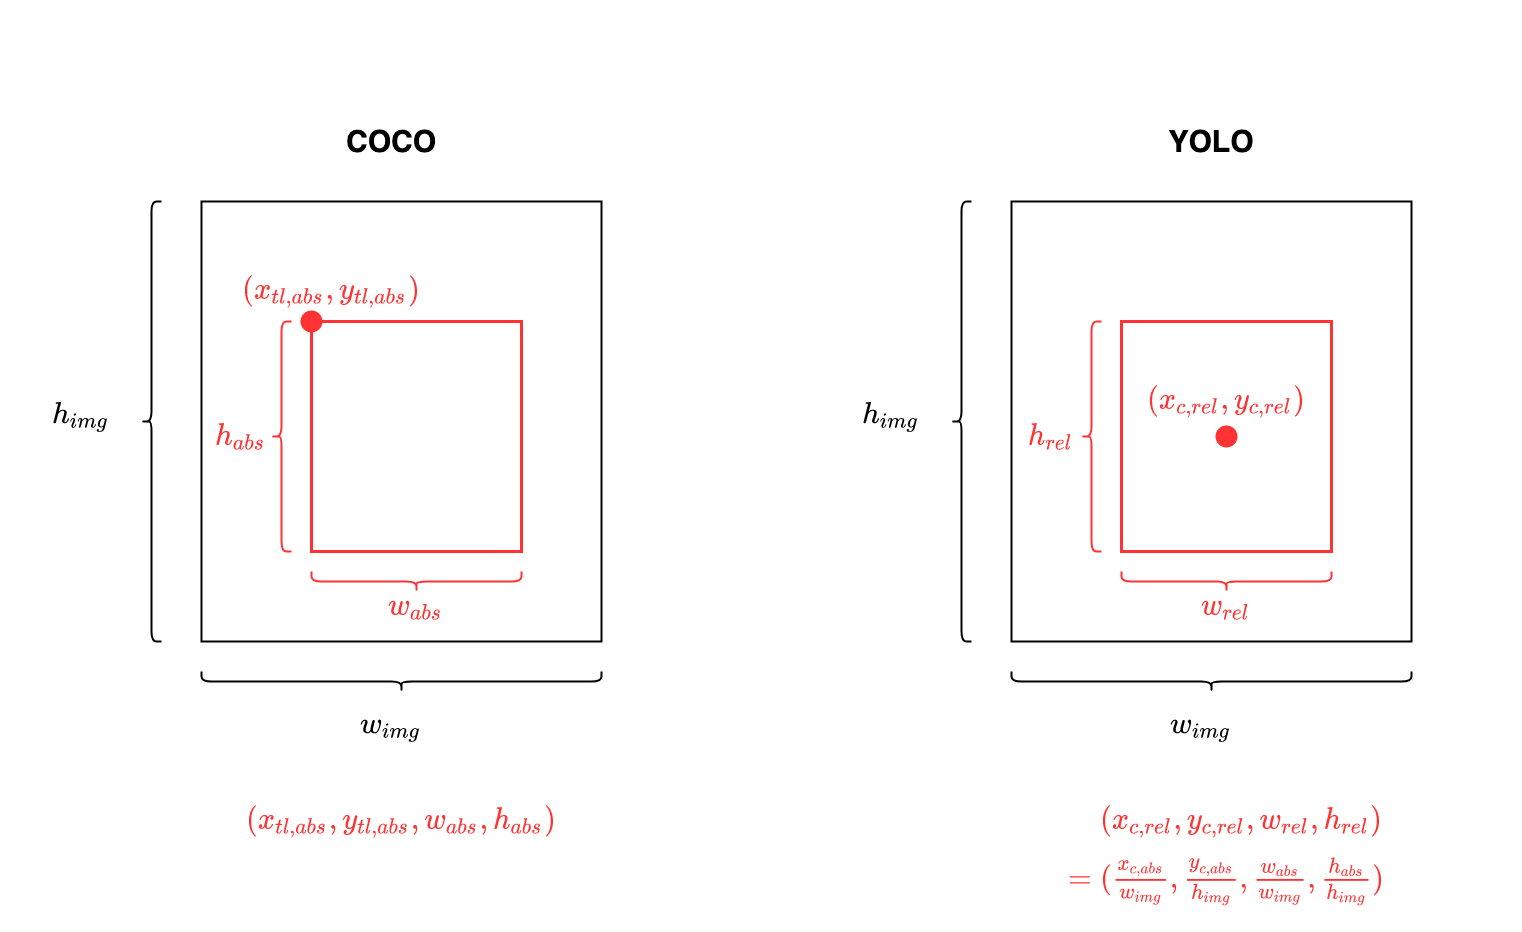
The following functions perform the conversion to yolov5’s bbox format, create a a label file containing all categories and create a .txt file for each image. Each txt file contains a row for each of the image’s annotation, as in the format description.
import os
import json
import shutil
from tqdm import tqdm

def convert_bbox_coco2yolo(img_width, img_height, bbox):
    """
    Convert bounding box from COCO  format to YOLO format

    Parameters
    ----------
    img_width : int
        width of image
    img_height : int
        height of image
    bbox : list[int]
        bounding box annotation in COCO format:
        [top left x position, top left y position, width, height]

    Returns
    -------
    list[float]
        bounding box annotation in YOLO format:
        [x_center_rel, y_center_rel, width_rel, height_rel]
    """

    # YOLO bounding box format: [x_center, y_center, width, height]
    # (float values relative to width and height of image)
    x_tl, y_tl, w, h = bbox

    dw = 1.0 / img_width
    dh = 1.0 / img_height

    x_center = x_tl + w / 2.0
    y_center = y_tl + h / 2.0

    x = x_center * dw
    y = y_center * dh
    w = w * dw
    h = h * dh

    return [x, y, w, h]

def convert_coco_json_to_yolo_txt(output_path, json_file):
    if os.path.exists(output_path):
        shutil.rmtree(output_path)
    path = os.makedirs(output_path)

    with open(json_file) as f:
        json_data = json.load(f)

    label_file = os.path.join(output_path, "labels")
    categories_list = ["person", "car", "bicycle"]
    with open(label_file, "w") as f:
        for category in tqdm(categories_list, desc="Categories"):
            f.write(f"{category}\n")

    for image in tqdm(json_data["images"], desc="Annotation txt for each image"):

        img_id = image["id"]
        img_name = image["file_name"]
        img_width = image["width"]
        img_height = image["height"]

        anno_in_image = [anno for anno in json_data["annotations"] if anno["image_id"] == img_id]
        anno_txt = os.path.join(output_path, img_name.split(".")[0] + ".txt")
        with open(anno_txt, "w") as f:
            for anno in anno_in_image:
                cur_cat = anno["category_id"]
                cat_dict = {1:0, 2:1, 3:2}   # creates a dict for the classes
                if cur_cat in [1,2,3]:       # only keep relevant labels
                    bbox_COCO = anno["bbox"]
                    x, y, w, h = convert_bbox_coco2yolo(img_width, img_height, bbox_COCO)
                    f.write(f"{cat_dict[cur_cat]} {x:.6f} {y:.6f} {w:.6f} {h:.6f}\n")

    print("Converting COCO Json to YOLO txt finished!")

convert_coco_json_to_yolo_txt("train_labels_output", "/local/path/fiftyone/coco-2017/train/labels.json")
convert_coco_json_to_yolo_txt("val_labels_output","/local/path/fiftyone/coco-2017/validation/labels.json")
Environment Preparation
Prerequisites:
- docker:
Install Docker Engine on Ubuntu
- nvidia-docker2
Installing the NVIDIA Container Toolkit — NVIDIA Container Toolkit 1.15.0 documentation
- hailo_model_zoo folder:
git clone https://github.com/hailo-ai/hailo_model_zoo.git
- Build the docker image:
cd hailo_model_zoo/training/yolov5
docker build --build-arg timezone=`cat /etc/timezone` -t yolov5:v0 .
- This command will build the docker image with the necessary requirements using the Dockerfile in the yolov5 directory.
- Start your docker:
docker run -it --ipc=host -v /path/to/local/drive:/path/to/docker/dir yolov5:v0 --name container_name
- If there is GPU available for use, use the flag
--gpus allto assign all available gpus to the docker container. To assign a specific GPU to the docker container (in case of multiple GPUs available in your machine) use--gpus device=device_number - /path/to/local/drive: path to a folder you might want access through the docker, for instance, the datasets folder.
- /path/to/docker/dir: where the new folder in the docker will be located, it can be for example /workspace/datasets/
After exiting the container you can re-start it and attach with:
docker start -ai container_name
- To list all containers:
docker ps -a
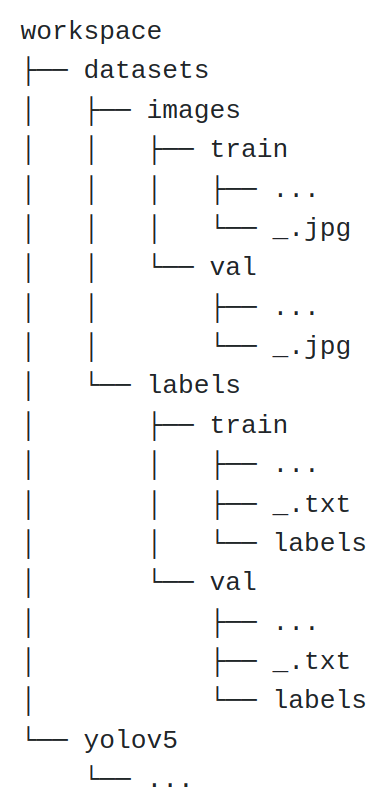
Folders Organization
For this example we have organized the folders in the following way:
Editing yaml files
Model YAML
cd /workspace/yolov5/models
vim yolov5.yaml
- Change the number of classes (nc) to the new value:
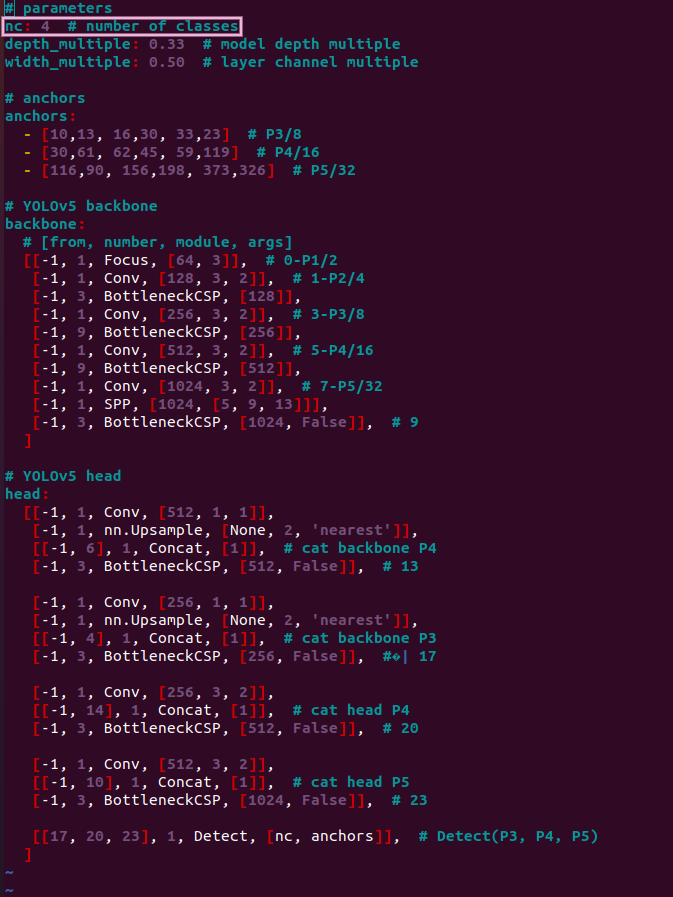
Note that even though the dataset has 3 classes, the number of classes is 4 to include background.
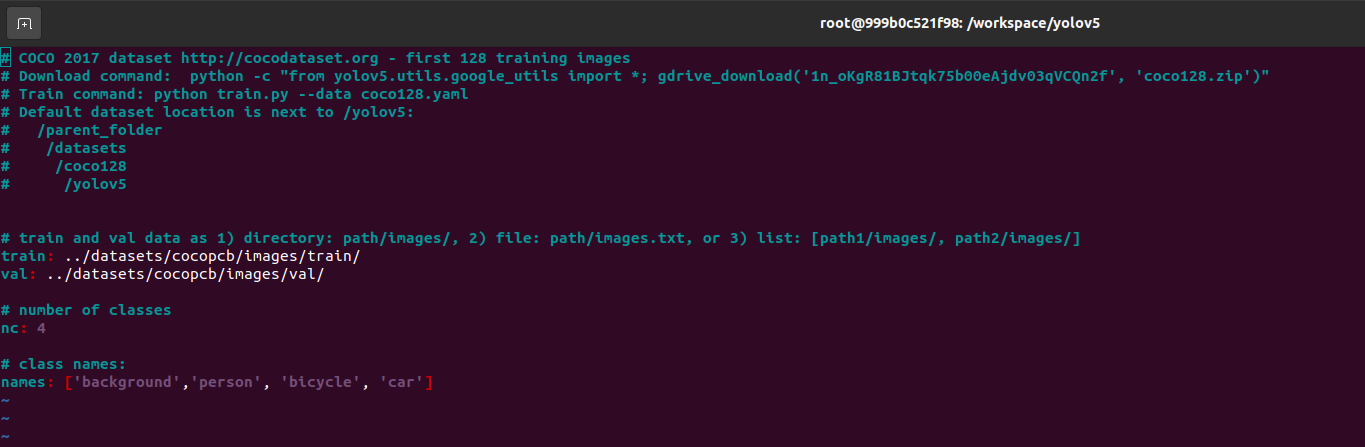
Dataset YAML
Create a copy of the coco128 yaml, edit the copy by changing the number of classes, class names, and dataset paths.
cd /workspace/yolov5/data
cp coco128.yaml dataset.yaml
vim dataset.yaml
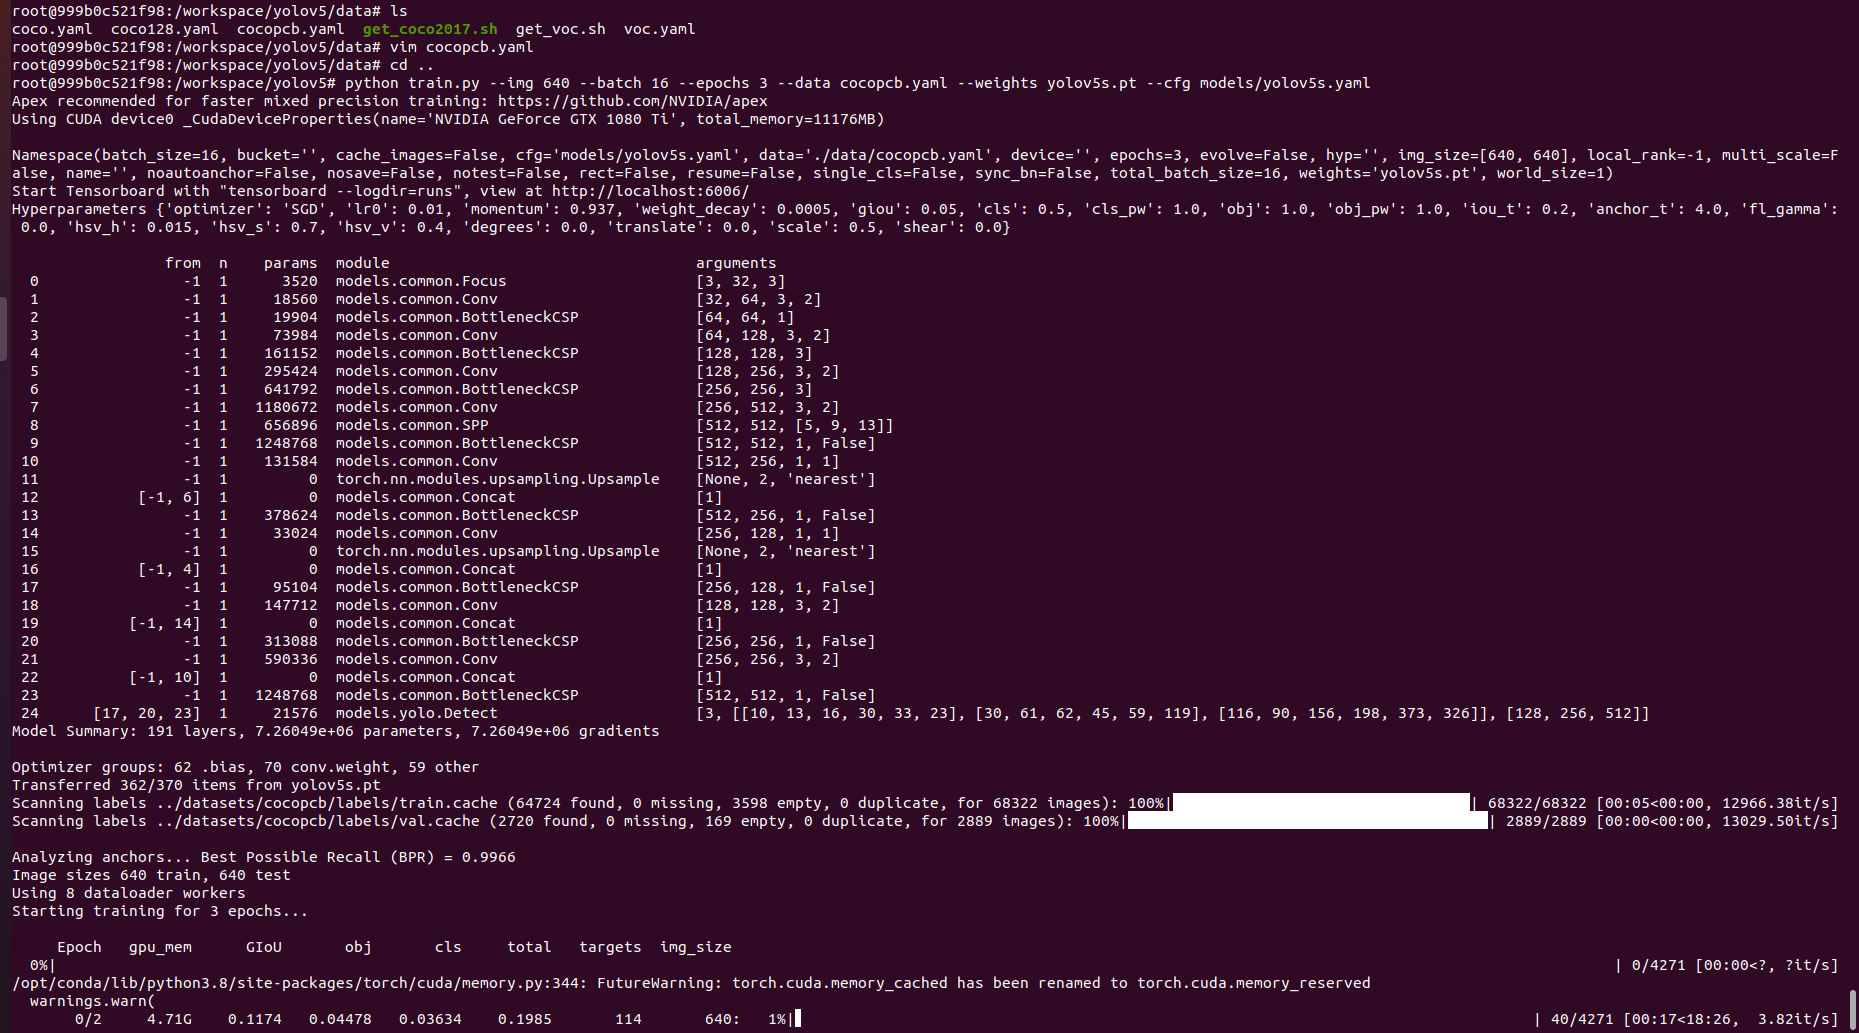
Training
From inside /workspace/yolov5/:
python train.py --img 640 --batch 16 --epochs 300 --data dataset.yaml --weights yolov5s.pt --cfg models/yolov5s.yaml
- –img: COCO trains at the native resolution of
--img 640. If there are many small objects then custom datasets will benefit from training at native or higher resolution. - –batch: use the largest amount the hardware allows for.
- –epochs: make sure that the number is below the overfitting threshold.
- –data: the name of the created dataset yaml file.
- –weights:
yolov5s.pt- pretrained weights. You can find the pretrained weights for yolov5s, yolov5m, yolov5l, yolov5x in your working directory.''- without pretrained weights, recommended for large datasets.
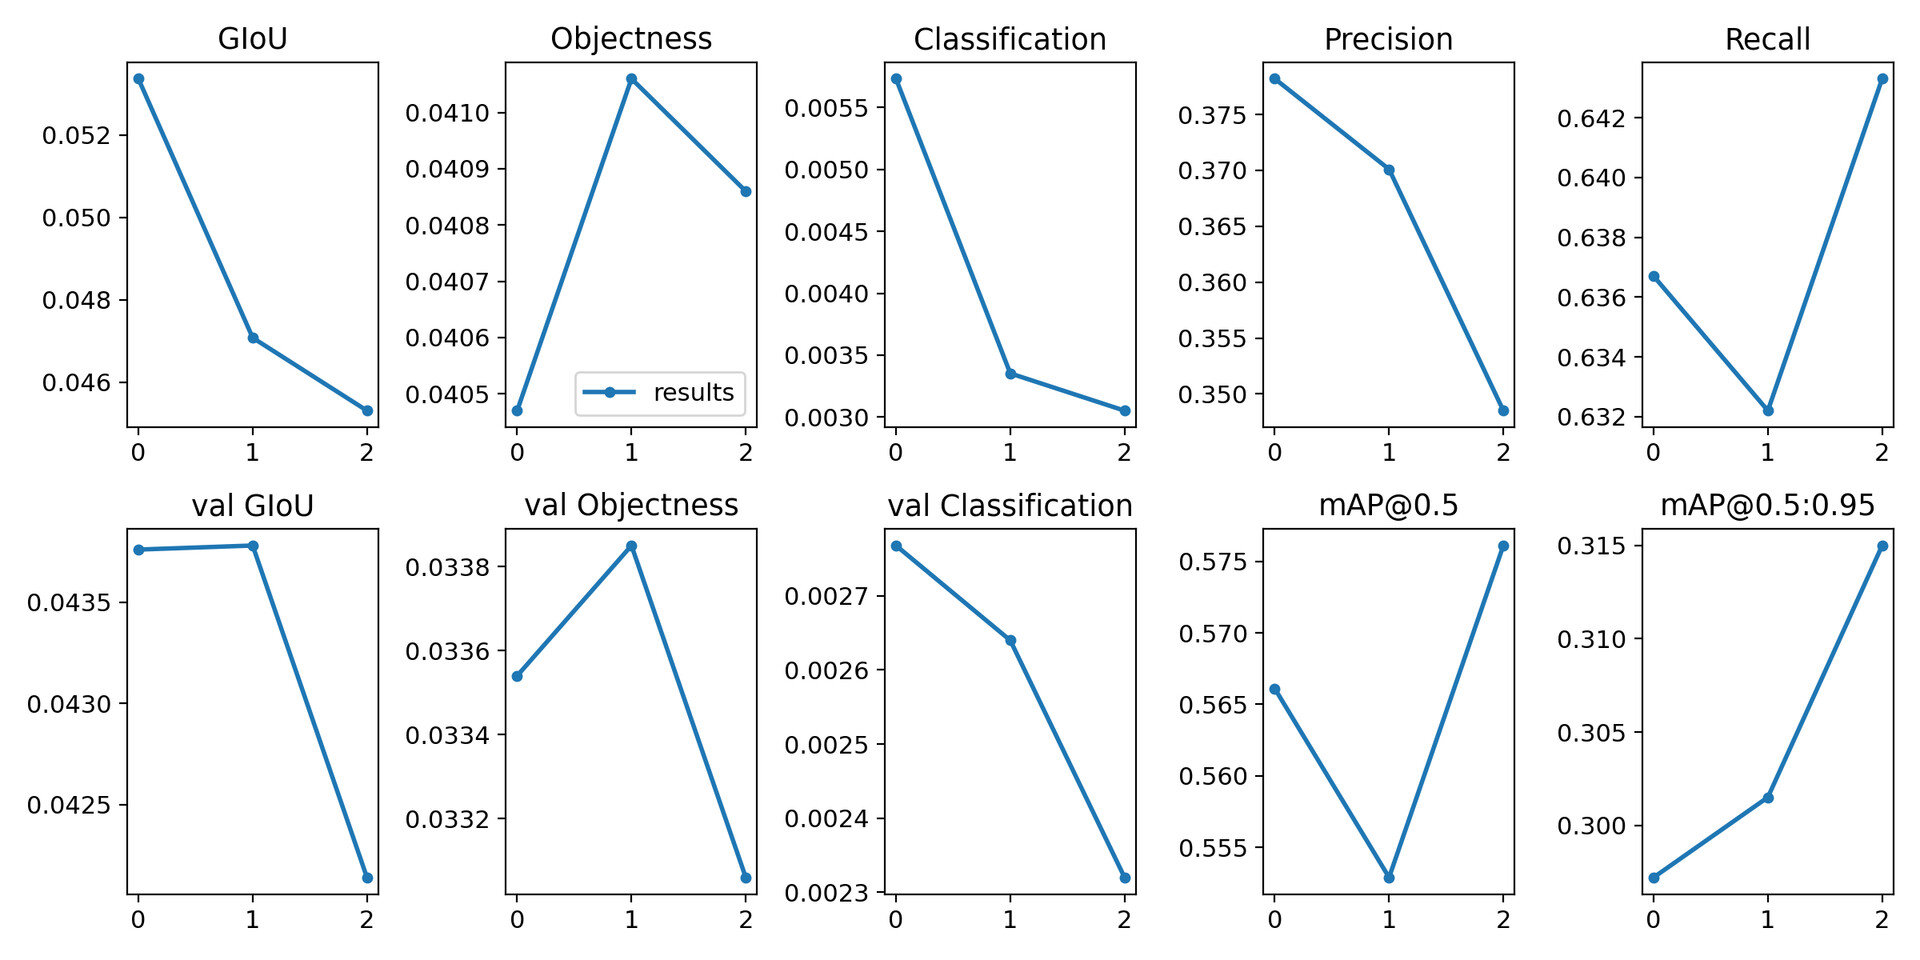
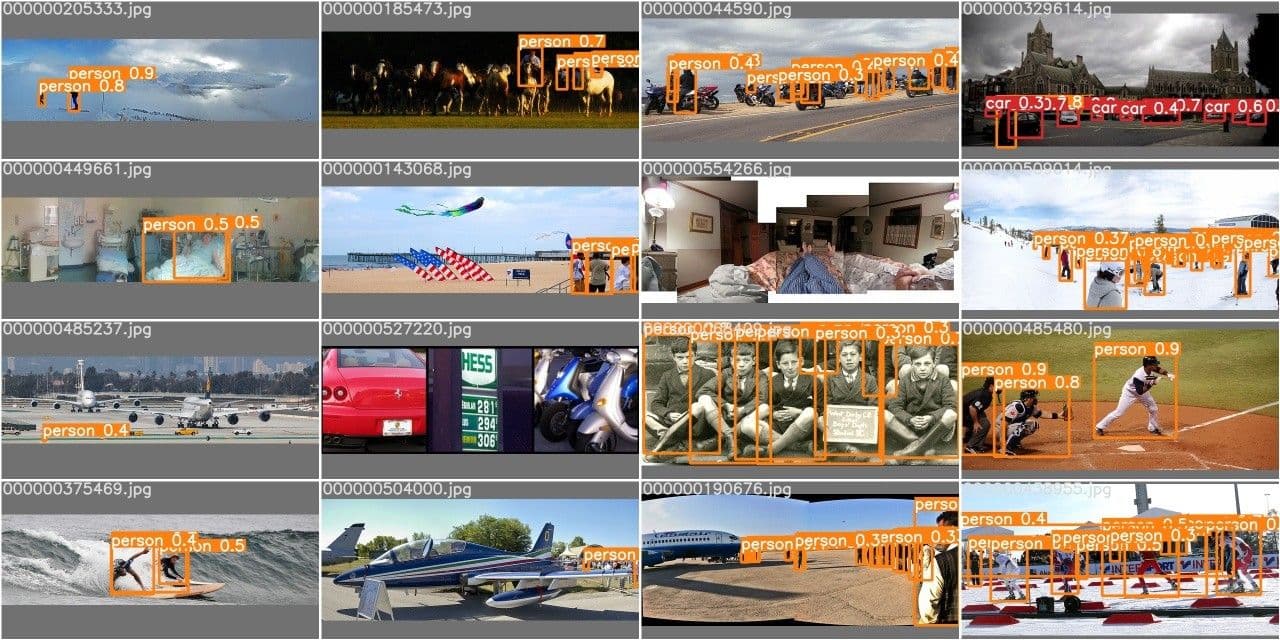
You can find the training results in /workspace/yolov5/runs/expn/, where n is the number of the last training run.
Exporting to ONNX
In the folder /workspace/yolov5/runs/ it is possible to see the data related to all training runs
Export at 640x640 with batch size 16:
python models/export.py --weights /path/to/trained/best.pt --img 640 --batch 16
- –weights: you can find it in /workspace/yolov5/runs/expn/weights, it’s better to use best.pt.
The resulting best.onnx file will be located in /yolov5/runs/expn/weights.
Compiling with Hailo Model Zoo
Prerequisites:
- A working model zoo environment. If not yet setup, run from inside of the hailo_model_zoo folder:
pip install -e .
Configuration yaml creation
cd /hailo_model_zoo/cfg/networks
cp yolov5s.yaml yolov5s_3classes.yaml
vim yolov5s_3classes.yaml
Add the following lines to the file:
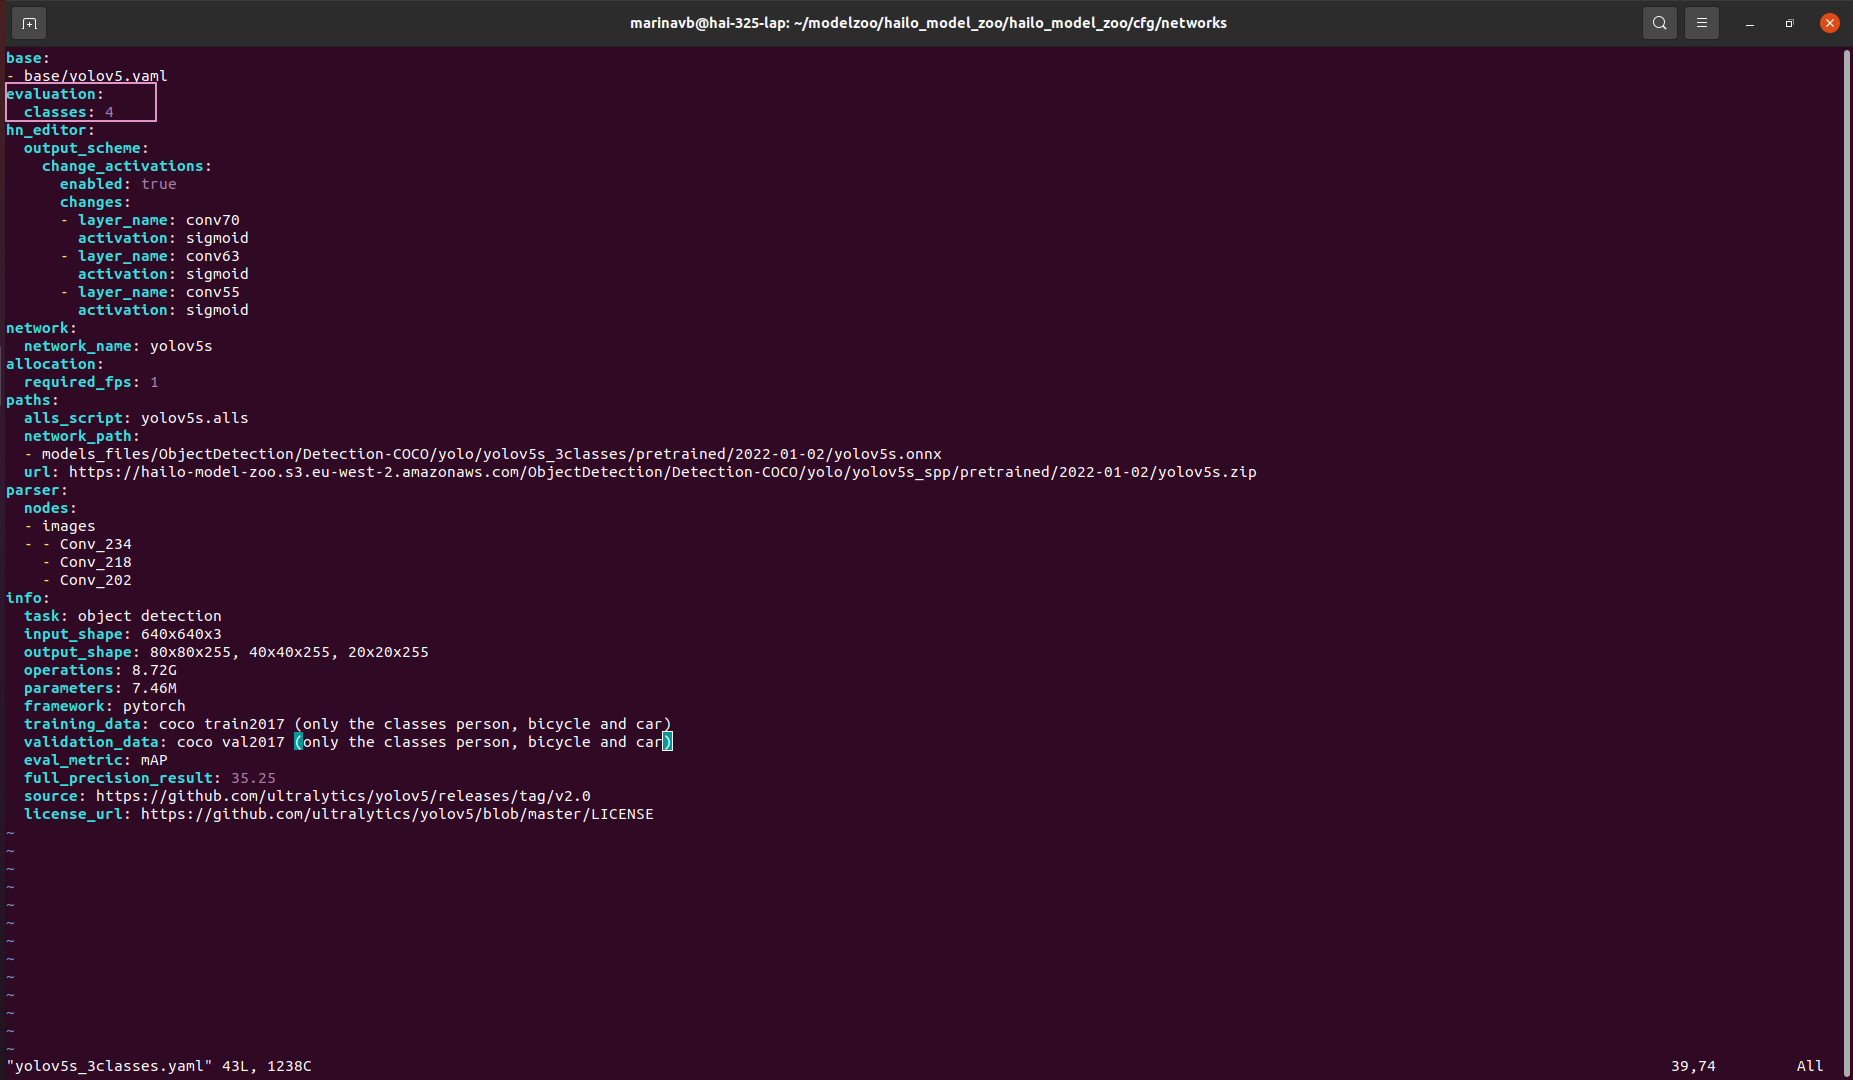
Compilation
Hailo Model Zoo will go through all the required stages to compile the model.
hailomz --ckpt yolov5s.onnx --calib-path /path/to/calibset --yaml yolov5s.yaml
- –ckpt: the onnx file resulting from the exporting stage.
- –calib-path: a small set of images
- –yaml: path to the yaml that was created on the previous section
The resulting hef file will be saved as yolov5s.hef inside the hailo_model_zoo folder.
Sources for this post: